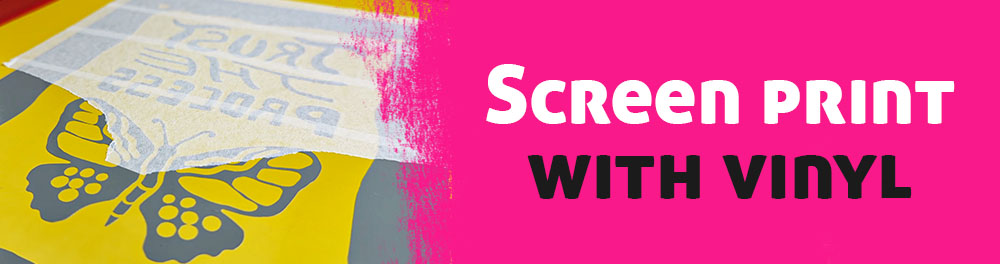
Split Fountain Gradient Printing
I spent two weeks of vacation in France (Rhône Alps). It was hot, full of mosquitos, but also really beautiful. I came back as relaxed as one can possibly be. But that was already weeks ago, and now Berlin autumn is stretching out its fingers. Today, September 24, I am sitting at my computer in a sweater, watching the green leaves outside my window slowly shift into yellow.
Seasonal changes are special because they pull you into the present. The air smells different, the wind on your face feels different (and a bit colder), and nature’s mood shifts into something quieter, not threatening but deeply calming.
This sounds like the cheesy intro to a boring book, so let’s get back to my art projects.

Split Fountain
What is it? It is not the name of a band, a book, or a waterfall somewhere in Iceland.
Split fountain printing, also called "rainbow roll", goes back to the 1870s. It was first used as a cost saving way to create colorful prints without full four color process printing. In screen printing the method places two or more inks next to each other on the screen and blends them directly with the squeegee. The result is a gradient that shifts a little with every pull, which means no two prints ever look exactly the same. The technique became iconic in the 1960s psychedelic poster scene, where artists like Gilbert Shelton and Peter Max used it for bold, vibrant designs. Find more examples here.
Today it is still loved by printmakers for its unpredictability and energy. And you will come across it sooner or later when you start your screen printing journey, just like I did.

Preperation
I was excited to basically get a multicolor print in just one pass. My plan was to create an even and hopefully flawless gradient.
It all sounded simple enough in theory: place two colors next to each other on the screen and let the squeegee do the blending. Well, I quickly learned I was wrong about that. Gradients have a mind of their own and are far less predictable.
I had burned some simple designs onto a screen and even simulated the gradient in Photoshop to test which colors I wanted to use. I went with yellow and pink, thinking it could look fresh and poppy. I already had neon pink and a pot of yellow at home. I mixed the pink with a little red, some white, and just a tiny touch of blue to tone it down so it wouldn’t look too neon bright. To be honest, I don’t have much experience mixing inks yet. This definitely goes on my “practice! practice! practice!” list.


Blending
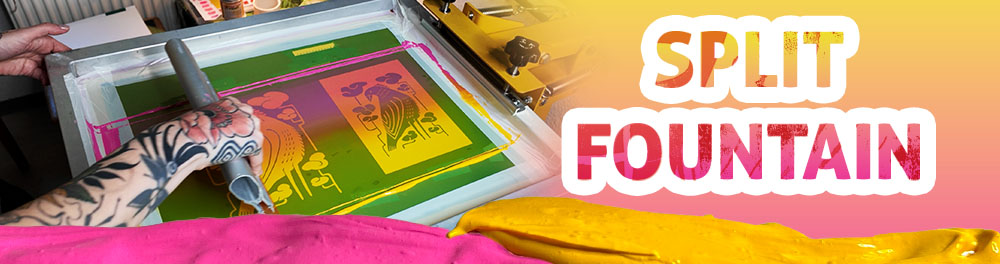
If you look at the ink on the squeegee (image below), you can see how the colors mix. This is how it looks after a few prints: pink and yellow are still strong, and in the middle there’s a bright orange. At this stage the gradient still feels like a three-color blend, just as I imagined.

But with each new flood and pass, the gradient shifts. The orange area keeps expanding, and the pink loses more and more of its intensity until everything turns into an orange-yellow gradient, which I don’t want. So before that happens, and it happens pretty quickly, I have to regularly reapply pink and yellow ink onto the screen.
It can also happen that one color takes over most of the gradient, making it look unbalanced. This can happen if my stroke isn’t straight enough or if I apply more ink of one color than the other (see image below).

Troubleshooting
When I applied the two inks side by side on the screen, they overlapped a little. I then placed the squeegee in the ink and moved it around a little so that the colors would mix slightly where they touched in the middle. The idea was to avoid a harsh edge before starting the flooding.
Looking back, I’m not sure this was a good idea, because it also created a swirl in the ink at the start before the gradient blended evenly (see images below). It took a few more prints until the gradient looked smooth and balanced.
So there’s only a short window where I could get decent prints, between reapplying fresh ink and the gradient shifting too far into orange. Hence I had a lot of misprints.


It was a bit frustrating at times, but still worth it, because in the end I got enough beautiful prints that I was really satisfied with.

Results and final thoughts
Sometimes the transition was too harsh, sometimes the shift was too strong and one color took over, and sometimes the inks blended too quickly, turning the gradient into one big orange blob. It took me a while to accept how little control I actually had over the gradient. I am sure more practice will help.
I had a lot of misprints, more than in any other printing session so far. On the positive side, the imperfections gave the prints some character, and of course I did not throw them away. They turned out to be excellent candidates for later test prints (monoprints), which you can see further below.
In the end I got prints I really loved, with gradients that looked even and balanced. But more importantly, I gained confidence in experimenting. Split fountain printing looked easy to me at first glance, but it definitely challenged me to stay attentive and keep adapting.


You can find the prints also in my Etsy shop.
Gradient version --> here and the black version --> here
What did I do with all the misprints?
I kept them to create more experimental prints. The bright, poppy gradient makes a great background for test prints. I already tried this by printing over them with the same design, but in black and flipped. I was surprised by how much I liked the outcome. The gradient works really well as a base for black designs.
If you look closely, you can still see the print underneath shining through the black, which almost gives it the look of an embossing. I liked them so much that I also added them to my shop. Check out all the different versions.


These experimental prints are also in my Etsy shop --> here
And yes, also for this print session I made an extra YouTube video.
It shows some of the extra obstacles I ran into, like running out of paper mid-session, a hole in the emulsion, and so on, all told with a pinch of humor. Hope you like it.
Like most of my videos where I talk, it is in german, but you can turn on EN subtitle.

Upcoming blog post:
I still have a screen with my logo waiting to be printed on a shirt and some tote bags (just for myself). I haven’t done much fabric printing yet, and the little I have tried felt more complicated than printing on paper. But let’s see, maybe it will work out just fine?