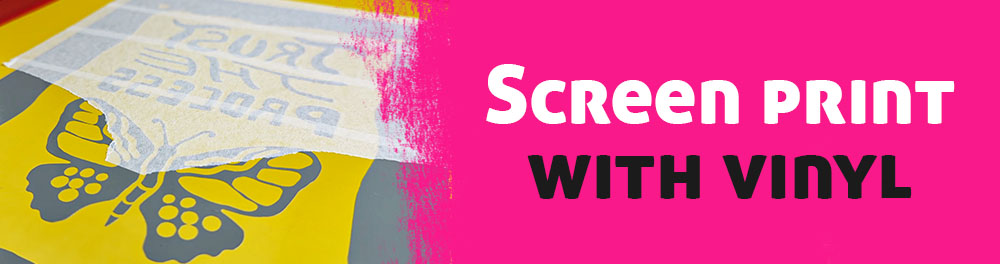
Screen Printing With Vinyl
Screen printing is a printmaking technique in which ink is pushed through a fine mesh called a screen onto a surface such as paper or fabric. For each color in a design, a separate stencil is placed on the screen to block certain areas. Traditionally, this stencil is created directly on the screen by exposing photo emulsion, but it can also be made in easier ways, for example by applying vinyl film to the mesh.
Curious about the advantages and disadvantages over the classic method I digged deeper into the subject. I figured it can be interesting for people who want to try screen printing right away without too many hurdles or a steep learning curve. That is why I would like to share my learnings in this blog entry. I think this approach makes it easier to get into the world of screen printing and still allows you to decide later whether you want to level up or not.

What I need
FYI: To visualize everything better, I suggest watching my YouTube video on printing with a vinyl stencil. It is in German, but you can turn on English subtitles. You can find it at the end of this blog post.
1. The most expensive item is probably the craft cutting machine that you need to cut your design stencil. I think mine, the Silhouette Portrait 4, was around 190 €, but I already had it at home for cutting stickers, so there were no extra costs for me.
2. I used my 80T screen (US: approx. 200 mesh) since I wanted to print on paper. If you want to print on fabric, you should probably use a lower mesh count.
3. For the vinyl foil I used Oracal 651, but I am sure other brands work as well. It can be easily removed from the screen after printing by simply pulling it off.
4. For transfer tape, you need to test which one works best for you. It should not be too sticky, but also not too weak. It needs to transfer the vinyl stencil well while still being easy to peel off afterward. I do not want to give a recommendation here, as I have only tried two brands so far.
5. I will also need a weeding tool to remove the excess vinyl from your design. If you own a cutting machine, it most likely already came with one.
6. A plastic squeegee helps remove air bubbles and uneven areas.


Creating the stencil
To create the vinyl stencil, I first prepared my design digitally on my iPad, then opened it as a PNG file in the cutting machine software and mirrored it before cutting. It is important to mirror the design, otherwise the final print will be reversed.
Most cutting machine programs already have a dedicated setting for vinyl. You do not want the machine to cut all the way through, only deep enough to cut the vinyl itself without damaging the backing paper.
After cutting, I carefully weeded out the excess vinyl using the weeding tool. I removed the parts where ink should later pass through. The vinyl that stays on the screen blocks the ink.
Next, I applied transfer tape to the vinyl stencil so I can transfer the whole thing in one piece. Once applied I removed the backing paper and placed the transfer tape with the vinyl attached flat on the table, with the sticky side facing upward. After that, I carefully positioned the screen on top of it, lowering it onto the vinyl with the outside of the screen facing down.
I used a plastic squeegee to press the screen down evenly, working from the center outward to help the vinyl adhere to the mesh and remove air bubbles.

After that, I flipped the screen over and slowly peeled off the transfer tape at a shallow angle, leaving the vinyl stencil on the screen. This step takes the longest and needs to be done very carefully, inch by inch, especially if your design includes single dots, thin lines, or other loose details. If you accidentally lift part of the vinyl, lower the transfer tape again and try once more.
Once the entire vinyl stencil was attached to the screen, I turned the screen over one more time and used the plastic squeegee again to press the mesh firmly against the vinyl stencil.

At this point, the screen is ready for printing!
This process is easiest to understand when you see it in action, so I recommend watching the YouTube video linked at the end of this post.

Printing
Since this is a two color print, I created two separate stencils. I printed the gold layer first. The overall printing process is very similar to printing with an emulsion stencil. I also used an off contact height of about 3 mm.
The main difference for me was the squeegee technique. I had to adjust it slightly. I worked with a slightly lower squeegee angle than usual and did two print passes instead of one. My sequence was lifting the screen, flooding it, placing the screen back down, then pulling the squeegee twice over the design to push the ink through the mesh onto the paper and fully clear the open areas. I also applied a bit more pressure than usual.
Otherwise, I noticed that the edges of the print were not as sharp and appeared slightly fuzzy. This improved once I adjusted the angle, pressure, and number of passes.
I believe, though I am not entirely sure, that this might be related to the vinyl stencil being slightly thicker than an emulsion stencil. I also wonder whether this could become more noticeable with higher mesh counts. That said, I do not think I will ever be able to weed a vinyl stencil with enough fine detail to require a 90T mesh or higher, as the level of detail that can realistically be weeded from vinyl is unfortunately limited.


After printing the gold layer, I took the screen to my bathtub, washed it out with water, removed the vinyl by simply pulling it off, and cleaned the screen once more. I then let the screen dry and prepared the stencil for the black color in the same way. Since I printed with water based inks for paper, the prints were already dry after about an hour, so I could continue printing the black layer right away.


I noticed that the vinyl is strong enough to stay on the screen even after washing it with water, which means it is possible to reuse the screen. I am not sure how often this works, though.
I believe that if you want the stencil to be truly permanent on the screen, you would need a different type of vinyl and a heat press, which I am not interested in. But I wanted to mention that this option exists.

I was really happy with the results of my “Trust The Process” prints. The text was sharp and all areas had solid ink coverage. I also experimented a bit by printing over older test prints (see below). I added the prints to my Etsy shop in case you are interested.


Conclusion:
I believe screen printing with vinyl is an excellent way to get into screen printing without much setup or hassle.
I was positively surprised by how well printing with vinyl works. You can turn an idea into a print within about an hour, which is a big advantage compared to the classic method of coating and exposing a screen. It saves a lot of time.
And no worries, you can easily print 70 prints or more without the vinyl stencil getting weaker. The vinyl held up very well on the screen. No issues at all. It worked just as well on the last print as on the first.
Another plus is that I do not have to use any chemicals. I also do not need to reclaim my screens with emulsion remover, since I can simply peel the vinyl off the screen by hand.
If you are wondering whether I would now switch completely to the vinyl method, the answer is no.
For me, the main downside is that the level of detail is limited. Simple designs work well, but more complex ones probably do not. This depends on the cutting machine and how well the vinyl transfers, so it is something you have to test. Many of the prints I have already made would not have been possible with a vinyl stencil.
Techniques like halftone printing are also not possible with vinyl.
Registering multiple colors is more difficult as well, since the vinyl is not see-thru and makes alignment harder.
To sum it up, I will stick to emulsion stencils for most of my future designs. However, vinyl stencils are a great additional method that I will use for simpler designs, individual gifts, or to quickly test ideas.
If this blog entry is still too abstract please watch my YouTube video where I explain everything in more detail.
Like most of my videos where I talk, it is in german, but you can turn on EN subtitle. :)

Upcoming blog post:
Perhaps it will be about the mini business cards I recently printed.
Other update: I made another YT video on how to print light ink opaque on black paper. I added another print to my shop "Elbphilharmonie Hamburg" this one was also printed using a vinyl stencil.
Ideas in the pipeline: I want to try screen printing stickers this year. I also can´t wait to do my first halftone screen printing.